
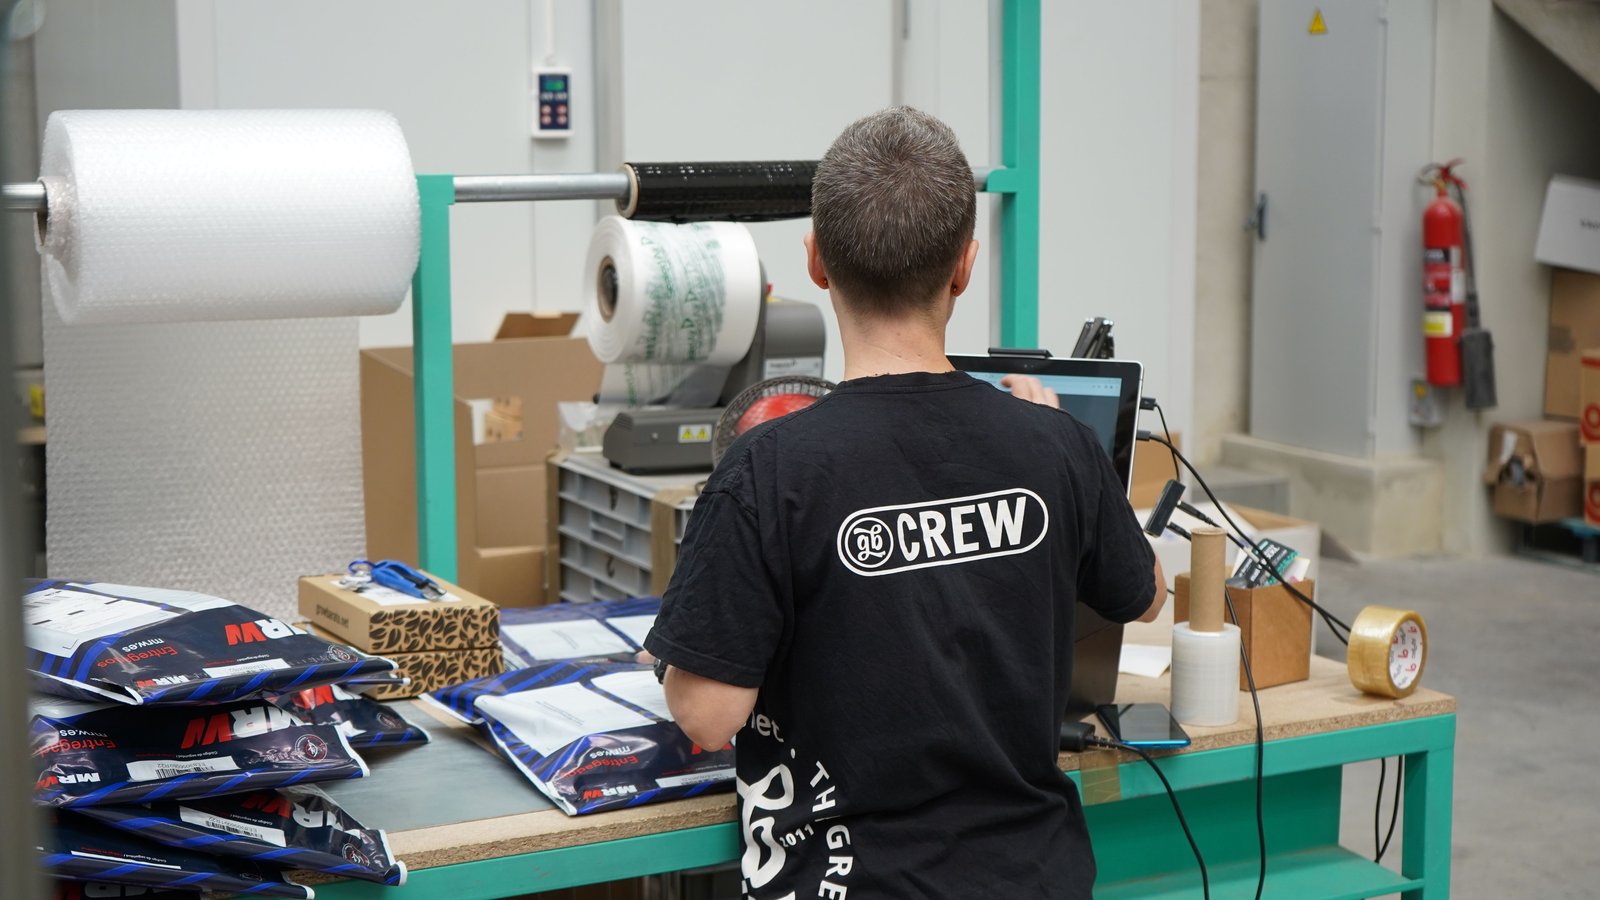
The tape is nearby. The right box is somewhere behind you. The mailers are under another order. A small product rolls toward the back of the bench.
A packing station can have every supply it needs and still make the work awkward.
Start by watching one order move across the surface. Where does the packer reach, turn, search, or put something down to deal with something else?
The example station in this guide gives those movements a place. You can apply its principles to an existing table; a custom station build is not required.
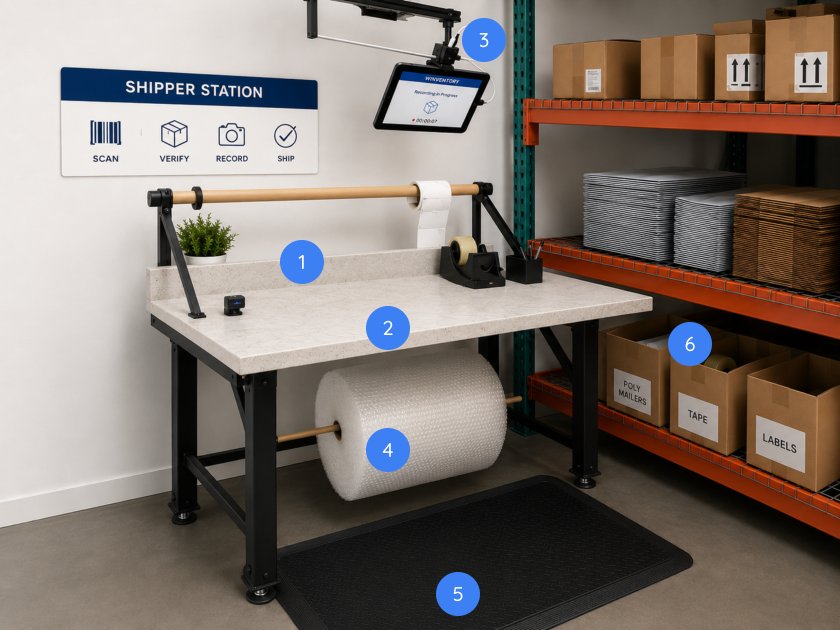
- 1 — Backsplash: a raised rear edge so small products do not drop behind the bench.
- 2 — Clear surface: open space kept for the order being packed, not for storage.
- 3 — Tablet mount: the screen held at eye level, off the work surface.
- 4 — Reachable supplies: wrapping material, tape and mailers within arm's reach.
- 5 — Working position: a mat and standing space so the packer can work comfortably.
- 6 — Box storage: labelled boxes and mailers on the shelving beside the bench.
- 1 Backsplash
- Raised rear edge so small products cannot fall behind the table. Side stops where exposed edges create the same problem.
- 2 Clear Surface
- Room for a typical box and its items, orders kept separate, and a surface that can be cleaned and inspected.
- 3 Tablet Mount
- Screen within reach and, where a recording workflow is used, an unobstructed view of the packing area, items entering the box, and sealing.
- 4 Reachable Supplies
- Wrapping material on a dispenser below the bench; tape and mailers close by without blocking the work or the camera view.
- 5 Working Position
- Appropriate height, clear foot and leg space, and a standing mat as an example feature rather than a requirement.
- 6 Box Storage
- Frequently used box sizes on adjacent storage, with a named owner for replenishment.
1. Protect The Rear Edge
The illustrated bench has a raised backsplash to help keep small products from falling behind it. Where exposed side edges create the same problem, suitable side stops may help too.
Watch the route products actually take. An edge that works for a large carton may do little for a small bottle or pencil-shaped item.
Keep the work surface inspectable. If an item goes missing, the team should not have to guess whether it fell, stayed in a tote, or entered a different box.
2. Leave Room For The Order
Your typical box and its items need usable space. A large table can still feel crowded if equipment, spare cartons, and unrelated orders occupy most of it.
Keep each order separate using a method appropriate to the workflow. Identify where the checked order arrives, where packing happens, and where the sealed parcel leaves.
Choose a surface that can be cleaned and maintained appropriately for the work. Avoid letting the packing area become a temporary storage location for everything that lacks a home.
3. Put supplies where the hands need them
The example places wrapping material on a dispenser below the bench and keeps tape and mailers close.
The principle is placement, not a particular dispenser. Supplies should be reachable without disturbing another order, blocking the work, or creating an obstruction.
Illustrative example: a packer leaves the station several times during an observed batch to fetch the same mailer size. Before buying a larger table, try a defined supply location and a replenishment check before the next batch. Observe whether the repeated trips stop.
Do not turn one observation into a promised time saving. Check the change on comparable work.
4. Keep Common Box Sizes Close
Place frequently used boxes on nearby storage that suits your floor. Packers should know where to find them and where to flag a shortage.
Keep access lanes clear. A pile of cartons beside the bench may be convenient for one person while making every other handoff harder.
Assign responsibility for replenishment. “Everyone helps” can become “nobody noticed we were nearly out.”
5. Make The Working Position Practical
Consider table height, space for feet and legs, reach, and the person doing the work. Follow your workplace’s safety and ergonomic guidance when adapting the station.
The source illustration includes a standing mat. Treat that as an example feature, not a requirement for every bench or worker.
After a layout change, ask the packer to demonstrate a routine order. Watch for awkward reach or turning that was not obvious in the drawing.
6. Keep Any Recording Setup Focused On The Work
If your operation uses SaleTrail’s packing-recording workflow, position its device so the packing area is visible and supplies do not obstruct the camera. The setup guide recommends checking the view of items entering the box and sealing.
Try the boxes your team actually uses. A camera view that looks clear with an empty bench may be blocked by a taller carton or the packer’s hands.
Packing footage can support investigation and a dispute response; its usefulness depends on what is visible. It does not guarantee an outcome. Product checking remains part of the workflow even when recording is present.
You can apply the rest of this station layout whether or not you use a recording device.
Make Neighboring Stations Familiar
Where several packers perform similar work, keep frequently used supplies and tools in consistent positions when practical. Someone moving between benches should be able to orient themselves quickly.
Consistency does not require every station to be identical. A position handling special packaging may need a different arrangement. Make the difference intentional and clear.
Put it to work: reset one bench
Choose one packing position and one representative order type.
Remove unrelated stock, give recurring supplies a defined place, and mark the incoming and completed-work areas. Run another comparable batch and ask what became easier—and what became harder.
Keep the changes that help before repeating the arrangement across the floor.
Packing Station Check
- Small items cannot easily disappear behind the bench.
- A typical order and box fit without mixing with another order.
- Tape, wrapping material, and mailers have defined locations.
- Common box sizes are nearby and replenishment has an owner.
- Foot space and access routes remain clear.
- Device mounts and cables do not obstruct the work.
- If recording is used, the actual packing activity is visible.
Next: use Follow the Order: Pick → Scan → Pack to check the handoffs around the bench, and Your New Packer Starts Monday to teach the setup consistently.